Materials
Stone and brick veneer on a Burnaby custom home: ties, air space and weep holes
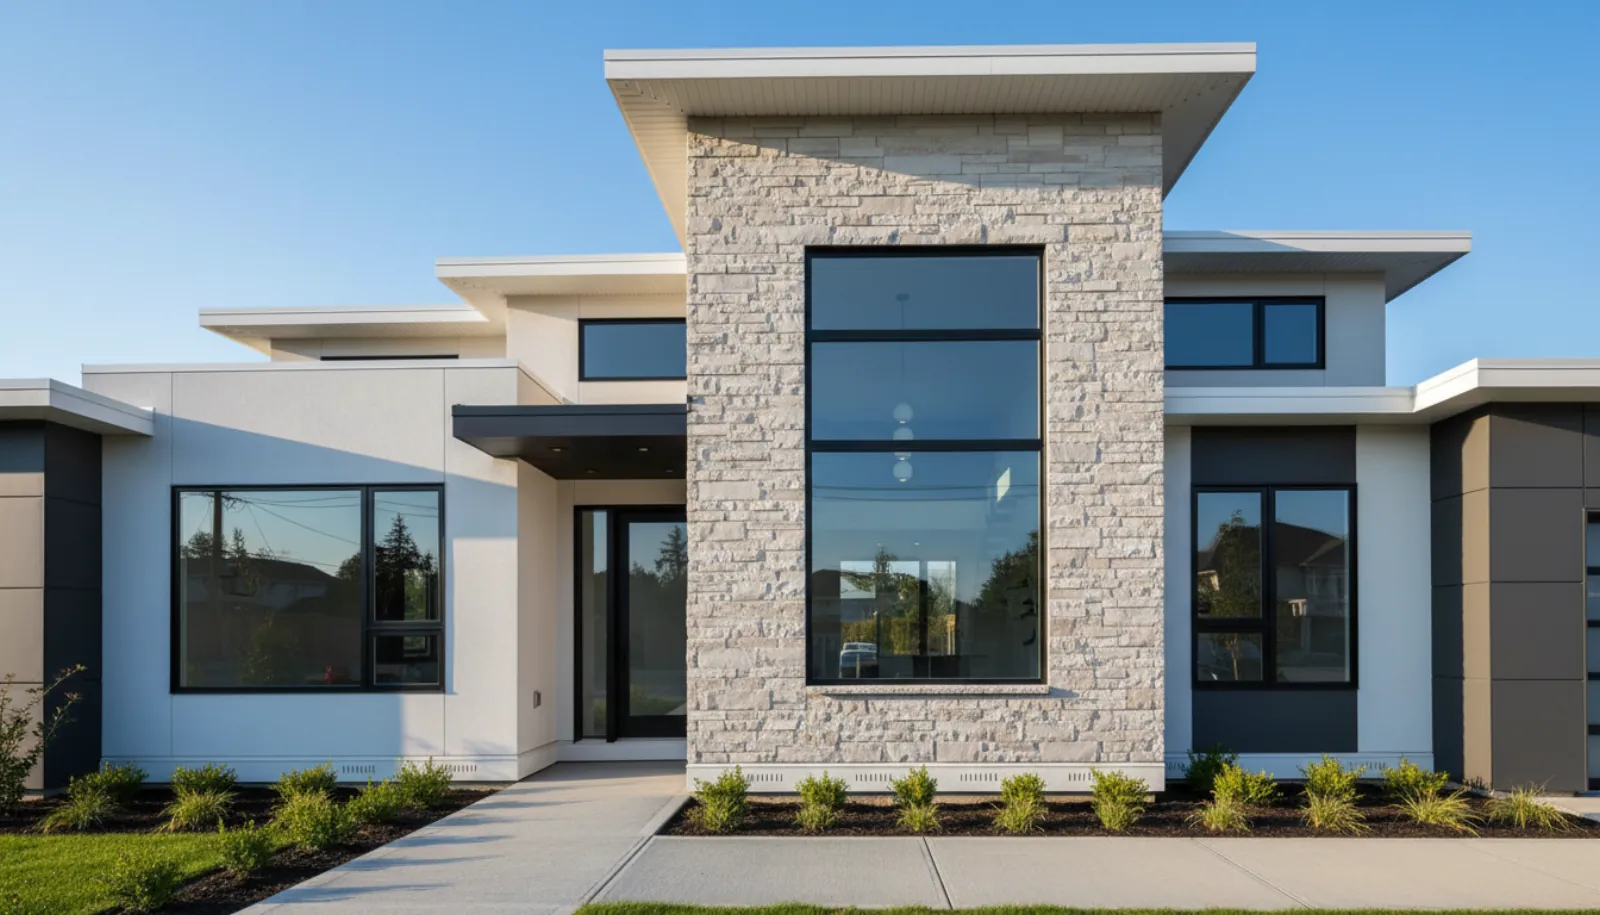
A wall of stone or brick gives a house weight and texture that lasts. On a wood-framed Burnaby house it is a veneer: a single layer of masonry tied to the frame, with an air space behind it, flashing at its base and weep holes to let water out. Here is what the BC Building Code asks for and how we build it.
"We want stone on the front."
It is a common request, and a good one. Stone or brick gives a house a feeling of weight that stays, it does not need painting, and it ages well in our climate when it is built correctly.
On a wood-framed house in Burnaby, that stone or brick is a veneer: a single layer of masonry standing on its own support in front of the wall, tied back to the frame, with an air space behind it. It sheds most of the rain and lets the rest drain away behind it.
The 2024 BC Building Code sets the details in Section 9.20. This post explains them, and how we build veneer on our Burnaby builds.
Full veneer: the units
Sentence 9.20.6.4(1) requires masonry veneer to be solid masonry units at least 75 mm thick, unless each unit is individually supported by the structural backing. That covers full-depth brick and stone veneer laid in mortar on a ledge or foundation.
Sentence 9.20.6.4(3) adds that veneer less than 90 mm thick must have unraked joints. A raked joint is one where the mortar is scraped back from the face, leaving a ledge that holds water. In a thin veneer, that ledge weakens the wall and lets water in.
The air space behind
Sentence 9.20.6.4(2) requires at least a 25 mm air space behind masonry veneer over wood-frame walls.
Masonry is porous. In a long Lower Mainland rain, water soaks through brick, stone and mortar to the back of the veneer. The air space lets that water run down the back face to the base of the wall, instead of soaking into the sheathing and framing. It also lets the veneer dry out between storms.
The space has to stay clear. Mortar dropped into it during laying can form a bridge that carries water across to the wall. We keep the cavity clean as the veneer goes up, and use a mesh or drainage mat at the base so droppings cannot block the weep holes.
Behind the air space, the wall has its own sheathing membrane, lapped to shed water. Our post on the building envelope and rainscreen covers that layer.
Ties: holding it to the house
A veneer standing on a ledge needs to be held back to the frame. Article 9.20.9.5 sets the ties for veneer 75 mm or thicker resting on a bearing support:
- Corrosion-resistant straps, at least 0.76 mm thick and 22 mm wide.
- Shaped to key into the mortar, and pre-bent at a right angle near the fastener hole.
- Fastened to the framing with corrosion-resistant No. 8 wood screws penetrating at least 38 mm, or spiral nails at least 76 mm long penetrating at least 63 mm.
- Spaced to Table 9.20.9.5: for example, at 400 mm vertically and 800 mm horizontally, or 600 mm vertically and 400 mm horizontally.
Burnaby sits in a high seismic zone. In an earthquake, the ties are what keep the veneer attached to the house. So we fix them into the studs at the code spacing, with corrosion-resistant metal that will last the life of the wall. Our post on seismic design covers the rest of the structure.
On a veneer wall, the work that matters is out of sight: the gap behind the stone, the ties, and the flashing at the bottom. That is where we spend our time.
Icon Projects Team
Support at the base
Full veneer is heavy, so it sits on a bearing support, usually a ledge on the concrete foundation or a steel angle fixed to the structure above a window or a floor line.
Sentence 9.20.8.5(1) limits how far solid veneer may overhang its support: no more than one third of the veneer's thickness. For rough stone, the projection and thickness are measured as averages (Sentence 9.20.8.5(2)). The foundation design includes the ledge for the veneer, so the foundation drawings and the elevations have to agree on where the stone goes. Our post on foundations on hillside lots covers how the foundation steps on sloped lots, which changes where the veneer can start.
Flashing and weep holes: letting the water out
Water that runs down the back of the veneer has to leave the wall. Two details do that.
Flashing. Article 9.20.13.3 requires flashing in masonry veneer walls beneath weep holes, beneath jointed masonry window sills, and over window and door heads where the eave does not protect them enough. Over a wood-frame wall, Sentence 9.20.13.6(2) says the flashing under the weep holes runs from at least 5 mm beyond the face of the wall below, up 150 mm onto the frame wall, and Sentence (3) puts it behind the sheathing membrane, so the membrane laps over it.
Weep holes. Article 9.20.13.8 requires weep holes no more than 800 mm apart at the bottom of the air space behind masonry veneer, and in the spaces above lintels over flashed window and door openings. Weep holes are small gaps or vents in the bottom course. They look like missing mortar, and they must stay open. We ask owners and landscapers to keep soil, mulch and paving below them.
Thin stone and manufactured stone
Many houses use thin stone or manufactured stone instead of full-depth units. These are lighter pieces adhered to the wall with mortar, without a ledge or ties.
Because each piece is supported individually by the backing, Sentence 9.20.6.4(4) points them to Subsection 4.3.2 of the code. In practice, thin adhered stone is installed to its maker's tested system: usually a drainage layer or rainscreen gap, a metal lath, a scratch coat of mortar, and the stone. The details at the base, around windows and at the top of the stone are reviewed by the building envelope consultant.
Thin stone is lighter and faster to install. It still needs drainage behind it in our climate. A thin stone wall without a drainage path traps water against the sheathing.
Choosing the material
The choice between brick, natural stone and manufactured stone affects the look, the weight and the details:
- Brick comes in regular units, so it lays in even courses with straight joints. It suits traditional, transitional and some modern designs. Its colour runs through the unit, so a chip does not show a different colour.
- Natural stone varies piece to piece in colour, size and texture. Ledgestone, cut in thin horizontal pieces, is common on modern houses. Full-depth natural stone is heavy and needs a strong ledge or angle.
- Manufactured stone is cast concrete shaped and coloured to look like stone. It is lighter and usually installed as thin adhered veneer. Its colour is on the surface, so cuts and chips can show the concrete beneath.
We look at full-size samples on site, in daylight, against the cladding and window colours around them, before ordering.
Living with it: maintenance
Well-built masonry veneer needs little care, and a few checks keep it working:
- Keep weep holes open. Soil, mulch, paving and plants should stay below the bottom course, and wasps or debris should be cleared from the vents.
- Watch the base. Stone at the base of a wall gets splashed by rain and sprinklers. Point sprinkler heads away from it.
- Check the sealant at windows, doors and where the stone meets other cladding. Sealant joints age faster than the stone, and they are part of the warranty-period checks.
- Clean gently. Pressure washers at close range can erode mortar joints. A soft brush and water does most of the job.
- Look for white staining. White deposits on brick or stone, called efflorescence, are salts carried out by water moving through the masonry. Some white staining in the first year is common as the mortar dries. Staining that keeps coming back points to water getting in somewhere, and is worth a look.
Our post on maintenance in years two to ten puts these checks on the yearly list.
Where veneer suits a Burnaby house
Stone and brick work well:
- At the base of the house, where a band of stone takes splashing and impact.
- On a feature wall at the entry or around the chimney.
- Near property lines, where masonry is noncombustible cladding that can help meet the code's fire spacing rules. Our post on windows near the property line covers those rules.
We often pair stone with fibre cement or metal panels on the rest of the house. Our post on exterior cladding compares the options.
How we build veneer on a Burnaby build
- Show the veneer on the foundation drawings, with the ledge or angle support.
- Detail the air space and flashing with the envelope consultant.
- Install ties into the studs at the code spacing, as the veneer goes up.
- Keep the cavity clean and the weep holes open.
- Flash every opening and the base of the wall.
- Keep grade below the weeps at landscaping.
Our custom homes service page shows how we build in Burnaby, Coquitlam and across the Lower Mainland.
Frequently asked questions
- How thick does masonry veneer have to be in BC?
- Sentence 9.20.6.4(1) of the 2024 BC Building Code requires masonry veneer to be solid masonry units at least 75 mm thick, unless each unit is individually supported by the structural backing. Veneer under 90 mm thick must have unraked joints.
- Does brick or stone veneer need an air space behind it?
- Yes. Sentence 9.20.6.4(2) requires at least a 25 mm air space behind masonry veneer over wood-frame walls. The space lets water that gets through the veneer drain down to the flashing and out through weep holes.
- How is masonry veneer attached to a wood-framed house?
- Article 9.20.9.5 requires veneer 75 mm or thicker on a bearing support to be tied to the wood framing with corrosion-resistant straps at least 0.76 mm thick and 22 mm wide, keyed into the mortar, fastened with No. 8 screws penetrating 38 mm or spiral nails penetrating 63 mm, and spaced per Table 9.20.9.5, for example 400 mm vertically and 800 mm horizontally.
- How far apart are weep holes in brick veneer?
- Article 9.20.13.8 requires weep holes no more than 800 mm apart at the bottom of the air space behind masonry veneer, and above lintels over window and door openings that need flashing.
- What flashing does masonry veneer need?
- Article 9.20.13.3 requires flashing beneath weep holes, beneath jointed masonry window sills, and over window and door heads in some conditions. Over a wood-frame wall, Sentence 9.20.13.6(2) says the flashing under the weep holes runs from at least 5 mm beyond the face below up 150 mm onto the wall, behind the sheathing membrane.
- Is thin stone veneer treated the same as full stone?
- No. Thin stone or manufactured stone that is adhered to the wall is individually supported by the backing, and Sentence 9.20.6.4(4) points it to Subsection 4.3.2 of the code. In practice it is installed to its maker's tested system, usually over a drainage layer and a lath and scratch coat, and the details are reviewed by the building envelope consultant.