Design
Lighting Design for a Burnaby Custom Home: Layers, Controls, and the Pot-Light Trap
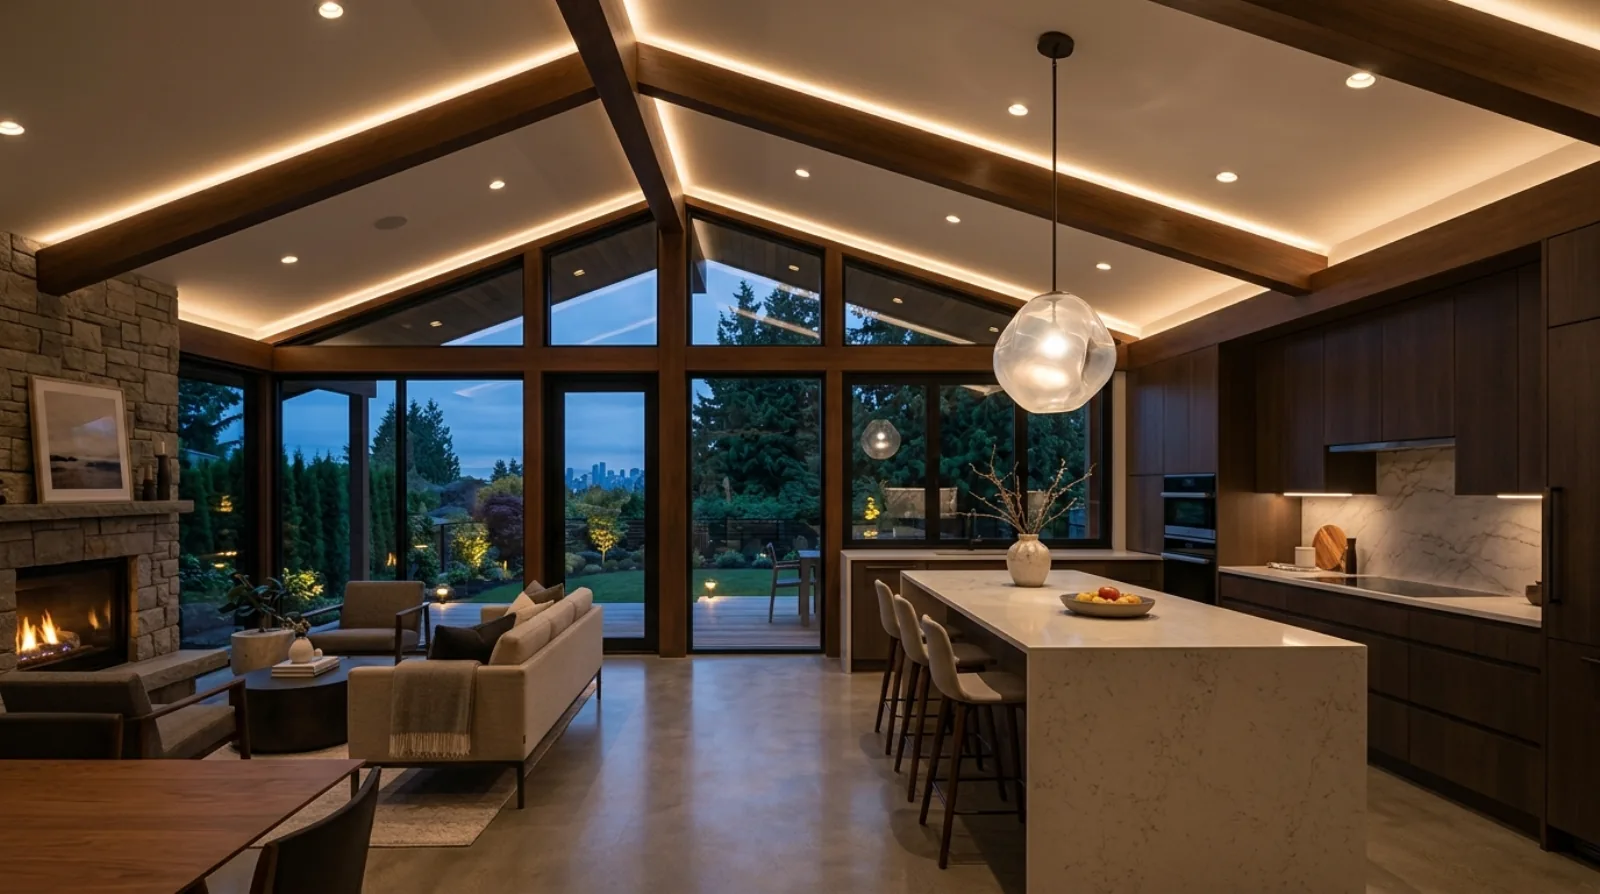
A lighting plan has to be drawn before the electrician roughs in the walls, not picked from a showroom shelf at the end. Here's how we layer light in a Burnaby home built for grey winters.
Why does a lighting plan have to be drawn before electrical rough-in?
Because almost every good lighting decision is buried in the walls and ceiling, and once the drywall is up you can't move it without cutting the house open. The position of every recessed fixture, every junction box for a pendant, the conduit for under-cabinet strips, the location of every dimmer and the way switches are grouped into circuits, all of that gets locked in at rough-in, the stage where the electrician runs wire through open framing before insulation and board go on. A lighting plan that arrives after rough-in isn't a plan. It's a list of regrets.
We see it constantly. The fixtures get chosen late, from a showroom, as a finishing decision, the same week people are picking faucets. By then the boxes are already in the ceiling on a default grid, the switches are already ganged the way the electrician guessed, and the homeowner is choosing pretty objects to hang on a wiring layout nobody designed. The fixture is the easy part. The plan is the hard part, and it has to come first.
So the lighting drawing belongs in the same conversation as the electrical service and panel, early, at the design table, while a change is still a line on paper instead of a saw cut through finished drywall.
The three layers: ambient, task, accent
Good lighting in a home isn't one source. It's three working together, and almost every flat, unhappy room we get called into is missing two of them.
- Ambient is the general fill, the light that lets you walk through a room and see it. Recessed cans, a central fixture, a cove that washes the ceiling. On its own, ambient light is fine for a hallway and miserable for a living room. It flattens faces and kills shadow.
- Task is light aimed at where you actually do things: under-cabinet strips on the counter, a pendant over the island, a reading lamp beside the bed, a vanity light at the mirror. Task light is what lets you chop an onion or read a book without working in your own shadow.
- Accent is the layer that gives a room depth and warmth, a wall washer on the stone fireplace, a picture light, a strip tucked into a bookshelf, an uplight on a feature wall. Accent light is what makes a room feel designed instead of merely lit.
When all three are on the plan and on separate switches, you can take one room from "bright and working" at 6 p.m. to "low and warm" at 9 p.m. without touching a single bulb. That flexibility is the whole point, and it lives entirely in how the circuits were drawn at rough-in.
A room lit one way is lit badly. The skill isn't picking fixtures, it's deciding what each layer does, then making sure the wiring lets you run them apart.
Icon Projects Team
Colour temperature and CRI matter more here than almost anywhere
This is where our climate changes the rules. From late October through March, Burnaby lives under low, grey, overcast skies. The artificial light in your house isn't a supplement to bright daylight for half the year, it's the main event, sometimes from mid-afternoon on.
Two numbers decide whether that light feels good or harsh.
Colour temperature, measured in kelvin, is how warm or cool the light reads. Lower numbers (around 2700K) are warm and yellow, like an old incandescent bulb. Higher numbers (4000K and up) are cool and blue, like an office or a hardware store. The dentist's-office feeling people complain about is almost always cool light, 4000K cans flooding a living room. In a home, in our climate, we lean warm: 2700K for living spaces, bedrooms, and dining, maybe 3000K in kitchens and bathrooms where you want a little more crispness for tasks. The mistake is running one cool temperature everywhere because it looked bright in the showroom.
CRI, the colour rendering index, is how truthfully a light shows colour, on a scale to 100. Cheap fixtures with a low CRI make wood look muddy, skin look grey, and that paint colour you agonized over look like a different colour entirely. We spec fixtures at CRI 90 or above for any space where colour matters, which is most of the house. It's an invisible decision until you live with the alternative, and then it's the difference between a warm room and a room that feels slightly wrong for reasons people can't name.
A small detail that pays off: keep the colour temperature consistent within a sightline. If you can stand in the kitchen and see the living room, those two spaces should run the same kelvin. Mixing 2700K and 3500K across an open plan reads as a mistake even to people who've never heard the word kelvin.
How lighting partners with daylight in a grey winter
Lighting design doesn't start with fixtures. It starts with where the daylight is, and isn't. A well-glazed Burnaby home pulls in a lot of light on a clear day, but the design has to assume the grey day, because that's most of the season here. The two systems are partners, and they should be planned together, the same way we coordinate the daylighting and window strategy before the fixtures are spec'd.
In practice that means the rooms that get the least daylight, north-facing spaces, a media room, a hillside lower floor cut into the slope in Capitol Hill or Burnaby Heights, get the most attention in the artificial plan. They need more layers and warmer light to feel inviting on a January afternoon. The rooms that flood with south light need dimming and zoning so the artificial layer can fade up gradually as the daylight drops, rather than snapping from bright to dark at 4 p.m.
The goal is a house that transitions gracefully. As the grey light outside fades, the interior layers come up to meet it. Done well, you barely notice the handoff. Done poorly, there's a hard moment every winter afternoon where the house suddenly feels like a cave and someone hits a switch that floods it with cold light.
Recessed, cove, and linear: using each for what it's good at
Pot lights, recessed cans, are not the enemy. Over-relying on them is. They're the right tool for general ambient fill and for task light over a counter, and the wrong tool for everything you want to feel warm.
- Recessed does ambient and downward task light. Spaced and dimmed properly, on a 90+ CRI source at 2700 to 3000K, a modest number of cans is genuinely useful. The trap is treating them as the only answer.
- Cove lighting, a continuous strip hidden in a ceiling detail or above cabinetry, washing light upward or along the ceiling, is one of the warmest moves in the toolkit. It's indirect, shadow-free, and flattering, and it makes a room feel taller. It's also a coordination job: the millworker, the drywaller, and the electrician all have to agree on the detail before it's framed.
- Linear and tape light lives under cabinets, in toe kicks, along stair stringers, and in shelving. It's almost all task and accent, and it's the layer that separates a custom home from a builder-grade one. It also has to be planned early, because the channels, the dimmable drivers, and the low-voltage runs all need to exist before the cabinets and trim go in. This is the same coordination we talk about with interior trim and millwork, the lighting and the woodwork get designed in the same breath.
The over-pot-lighting mistake, and why we fight it
Here's the single most common thing we talk clients out of: a ceiling full of recessed cans on a tight grid, everywhere, as the entire lighting strategy.
It happens because cans are cheap, they're easy to draw, and a ceiling that's evenly dotted with them looks thorough on a plan. But a grid of downlights does exactly one thing, it lights the floor. It throws hard light straight down, casting shadows under everyone's eyes, flattening the room, and giving you that institutional feeling no amount of dimming fully fixes. Fifteen cans in a living room is not a lighting plan; it's the absence of one.
The fix is restraint plus layers. Fewer cans, placed deliberately for the ambient and task they're actually good at, paired with cove, accent, and the warm pools of light from lamps and pendants. A room with eight well-placed sources at three different heights feels alive. The same room with fifteen ceiling cans feels like a meeting room. We'd rather spend the budget on a few good layers than on a ceiling full of holes.
Dimming and controls, planned as circuits not afterthoughts
Every layer we've talked about is worthless if it's all on one switch. The control plan is where the layers become usable.
At minimum, the three layers in each main room should be on separate dimmable circuits so you can balance them by time of day. Beyond that, the question is how much control system the house wants. A straightforward approach is quality dimmers at the wall, but the moment a homeowner wants scenes ("evening" dims the cans, brings up the cove, and warms the accents with one tap), or wants lighting to coordinate with shades and audio, you're into a low-voltage control system, and that decision has to be made before rough-in because it changes the wiring entirely.
That's the overlap with the broader home automation and low-voltage wiring plan. Whether the house runs simple smart dimmers or a full lighting-control system, the conduit, the neutral wires, and the keypad locations all get committed at the same rough-in stage as the lighting layers themselves. Decide it late and you're choosing from whatever works without opening walls, which is a much smaller menu.
One more practical note: keep dimming and the load picture in mind together. LED lighting draws very little, but a control system, motorized shades, and the rest of a modern low-voltage package all add up, and they belong in the same early electrical conversation as the panel and service sizing.
Why lighting is on the features-worth-investing-in list
We put lighting near the top of the features worth investing in for a simple reason: it's experienced every single day, it can't be retrofitted cheaply, and it does more for how a home feels than almost any finish you can name. You will look at the lighting more than the countertop and the cladding combined.
It's also the rare upgrade that's nearly free if you plan it and brutally expensive if you don't. The wire to run a cove, the conduit for a control system, the extra circuits to separate the layers, at rough-in, that's marginal. After the drywall, it's a renovation. The investment isn't really in fixtures. It's in deciding, early, that the house gets a real lighting plan before the electrician guesses for you.
Frequently asked questions
When in the build do we choose lighting? The lighting plan, layout, circuits, control system, layer strategy, gets drawn during design, before electrical rough-in. The actual fixtures (the visible pendants, sconces, lamps) can be finalized later, but the wiring that supports them is committed when the electrician runs wire through open framing. Choosing only the fixtures and skipping the plan is the mistake.
What colour temperature should a Burnaby home use? For living spaces, bedrooms, and dining, we lean warm, around 2700K. Kitchens and bathrooms can step slightly cooler to about 3000K for task crispness. The two rules that matter most: keep the temperature consistent within any sightline, and spec fixtures at CRI 90 or above so colours and skin tones read true under our grey winter light.
Are pot lights bad? No, over-relying on them is. Recessed cans are the right tool for ambient fill and downward task light. The mistake is using them as the entire plan, which lights the floor, flattens the room, and feels institutional. Pair a restrained number of cans with cove, accent, and lamp light, all on separate dimmers.
Do we need a smart lighting-control system? Not necessarily. Quality dimmers at the wall handle most homes well. A control system earns its place when you want scenes, or want lighting to coordinate with shades and audio. Either way, the decision has to be made before rough-in, because it changes the wiring, retrofitting it later means opening walls.
A house can have a flawless envelope, the right windows, and beautiful millwork, and still feel cold and clinical because nobody drew a lighting plan. The reverse is also true: a modest room, lit in three layers with warm, honest light on separate dimmers, feels like somewhere you want to be on the darkest afternoon of the year. That's the whole job, and it's decided before the drywall goes up, or not at all.
Related on the Journal